Thursday, April 15, 2010

Things We Love

Jill is 5 months old now, and she's becoming very particular about what she loves and what she doesn't. And as everyone knows, what she loves is what we love . . .
We love to read the newspaper, especially the Sunday ads.
We love fruit.

Or maybe it's the spoons. We LOVE spoons.

We love to do laundry.

Or maybe not.

It's to early to tell how committed we are to the family business.

Tuesday, April 13, 2010

How to - Make your own nursing pads

Congratulations to all the new moms (and dads) in my life who have asked for this sewing tutorial.
If you've had a baby, you've noticed that they come with some necessary but expensive gear. It's always a good idea to look for ways to save. Nursing pads are one of my least favorite baby items to buy. I feel like it's such a waste sometimes, especially when I get the inexpensive brand and then they don't do what I need them to do.

So, after a little Internet searching (hurray for the Internet), and a little personal experimentation, here is an easy to make and very effective 6" contoured nursing pad. (You can also make a 4" flat pad* by using a CD for your circle pattern. I have both sizes and love them both for different reasons.)
You will need a 6 3/4" disk (I use a plastic lid; sizes can vary) or CD (for smaller pads*), quilt batting (the higher loft the better), blanket felt, polar fleece (the two sided heavy stuff), scissors, and a sewing machine.

Step 1: Trace and cut your circles. 1 fleece, 1 quilt batting, and 2 felt.


Step 2: Stack your circles like a sandwich with the 2 felt pieces as the bread and the fleece and batting as the filler.
Step 3: Choose your favorite sewn edging stitch. I prefer to sew two straight stitches around the edge . . . the first one with my needle at the far right position . . .

the second with my needle in the middle position, but a zig-zag stitch would also work well.

and sew, sew, sew all the way around your circle.

Step 4: Make a 3" cut through all the layers from the edge of your pad to the middle of your pad.


Step 5: Overlap the two sides of pad by 2 inches.

Step 6: Sew up the sides of your overlap to secure the fold in place.

Step 7: Trim the excess fabric off the outside of your circle. (I trim right up to my stitches.) This will keep your pads looking nice and not ragged when you wash them.

There you have it. Now go be thrifty and eco-friendly at the same time. (That's what I call multi-tasking.)

*For 4" flat pads, follow the same beginning steps, then skip steps 4-6.

Saturday, April 10, 2010

April Fooled

Ha Ha Ha. Spring brought us ALL such a nice surprise this year. But she was sooo tricky about it. The last week of March was beautiful, in the 40's and 50's all week long. (That's wonderful for March in Idaho.) I was so excited and though we might have a lovely spring from here on out. April 1st and 2nd were the most beautiful days of all. Then, on April 3rd, Mother nature got a good laugh as she YELLED "April Fools" and dropped 4 inches of snow on my front step.

Matt and I were planning on grilling to welcome Spring, but I guess the invitation got lost in the mail. Oh well, at least we weren't part of the sad Easter troop that got to hunt eggs in the snow.

Good one Mother N. You fooled us all.

(Wish I had pictures, but I was to disgusted to take any this year.)

Wednesday, March 31, 2010

Everything I know about cold sores . . .

They come very late at night when you least expect and usually right before a very large, picturesque, life event . . . right girls.

Over the years, through sad experience, I've become one of my families experts on cold sores. After a few recent calls from family members in the thralls of cold sore trauma, I've decided to share everything I know that helps and somethings I've heard that help but I haven't tried. (Noted by a *.)

Cold sores, fever blisters, and sun blisters can appear as a result of stress, too much work, being over tired, or having chapped lips from not drinking enough or being out in the sun too long.

Remember that the germs that cause sores can linger on chap stick and lip gloss. Using an infected product can reinfect you lips. Be safe and throw away any balm or gloss you are unsure about.

To prevent, try drinking more water, getting plenty of sleep (ha ha), getting a good lip gloss with UV protection, and taking yoga classes.

When you feel that tell-tale burning sensation of your lips, treat it with my two step philosophy . . . "Clean and Dry." Here are some ways to keep your new found friend clean and dry and help it on it's way:

1. Wash with water and a soft washcloth at the first sign; then dab with a q-tip of rubbing alcohol.
2. Keep some handy alcohol wipes in your car or purse in case you feel one coming on while you're on the go.
3. A strong mouthwash also works great in place of rubbing alcohol.
4. Try this product: Abreva . Keep it in your pocket and apply multiple times a day.
5. If you're home all day, put on a movie and hold an ice cube to your lip.
6. Try this product: Neosporin or any antibiotic ointment. I put the regular cuts and scratches stuff right on my lip. Reapply multiple times a day. (If anyone tries the lip health products, please let me know how they do.)
7. Try this product: Carmex. It's great for prevention but works very slowly as a treatment.

For kids: Don't put anything on your kids lips you don't want them to lick off. For rashes and dry lips and cheeks try Lansinoh HPA Brand Lanolin and Carmex.

For bad inside mouth sores, amp your brushing up to three times a day, or after every meal. Get a good mouth wash to use after brushing and flossing. If this doesn't help, but some mouth wash on a q-tip and hold it right up against your sore for 30 seconds. Do this every morning and evening until it's gone. For more advice on this, talk to Mom.

Long term help:
Try L-Lysine - a dietary supplement used to improve immunity and skin health
If you feel like you have a serious health problem, talk to your doctor about a prescription for Acyclovir -medicine designed specifically to treat pervasive lip sores.*

Thursday, March 25, 2010

For Cheri

For Cheri, on her birthday, I would like to offer the wonderful gift of options. I know 7 is one of those ages, one of those times in life, when you feel like options are scarce and the available options are all less than optimal. Here are some options that you will love. I promise, they are all good.

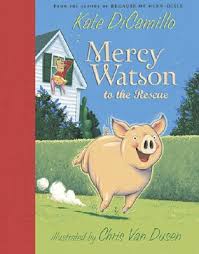
Option A) The Mercy Watson Series by Kate DiCamillo. Oh my goodness. This is really funny. It's about a family that owns a pig as a pet and the funny thing she does and their funny neighbors. My favorite so far is "Mercy Watson Fights Crime."

Option B) The Stories Julian Tells by Ann Cameron. Here you have a classic!! I love this book and it's sequal. I loved it when I was 7 and I still love it now that I'm . . . well, never mind. It's about Julian, of course, and the funny funny stories he tells his sister.

Option C) Cowgirl Kate and Cocoa by Erica Silverman. Do you love Horses? I think you do. You will love Kate and Cocoa. Cocoa talks!!!! It doesn't get any better than that.

"What's so good about these options?," you ask. Well, They're short, they're funny, and there are more where these came from. That's what is so good about them.
Happy Birthday Cheri

Sunday, March 21, 2010

Give me a C


At our house C is for cookie. That's what I sing everytime I put a Cookie Monster diaper on little bit. But to day C is for cookie and for Chelsea. Happy birthday Chelsea. Here are some cookies for your birthday. I wish I could be there and make them for you.
Peanut Butter Rolo Cookies
1 cup sugar
1 cup powdered sugar
1 cup shortning
1 cup peanut butter
2 eggs
2 cups flour
1 teaspoon vanilla
2 teasoppns baking soda
1 teaspoon salt
1 package of Rolo chocolates (about13)
1. Mix all ingredients together except rolos
2. When dough is mixed well, take a small amount, flatten out in hand and place a rolo in the middle. Close the dough around to form a ball.
3. Place on ungreased cookie sheet and bake at 350 for 12 minutes. Let cool before eating.

Saturday, March 20, 2010

Soda and Scratchers

I love Magic! I love when I feel like my house is cleaned by Magic. But the other week I was out of Magic. So I used the next best thing . . .

AND

My husband calls them scratchers, but they are jsut scrub pads. So, the next time you're out of Magic, or if you have unfounded chemical fears, just go with Soda and Scratchers. I promise, you're feel like you discovered the cure to soap scum.